
Ever wondered how a raised spot UV print is achieved? Or how an intricate gold foil is patterned across a business card? It all starts with the artwork. In this guide, we’ll show you how to set up your document to use foil or spot UV or raised finishes.
The first step is to determine which elements will use the effect. You’ll need vector art, so make sure all fonts are outlined and all shapes have paths. If you don’t have software capable of this, we’re happy to lend our mad Illustrator skillz.
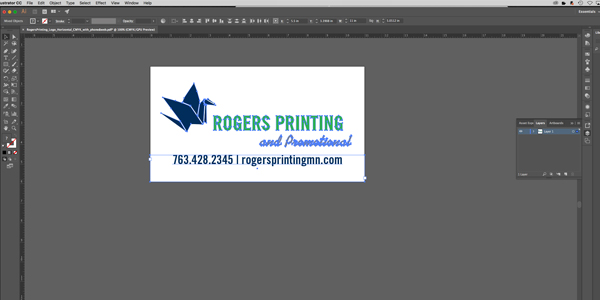
Here in Illustrator I have some type that needs to be converted. I’m going to quickly select all (CMD+A) and create outlines (CMD + SHIFT + O) so that all my art will print perfectly.

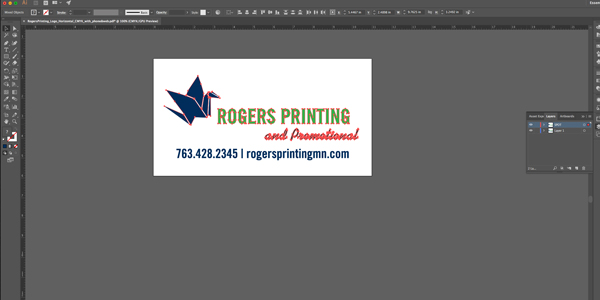
I’ll save this file as my “normal” print. Now that I can see the paths of everything, I decided I just want the logo to have the effect. I’m going to select just that part, copy it, and create a new layer to paste it into.
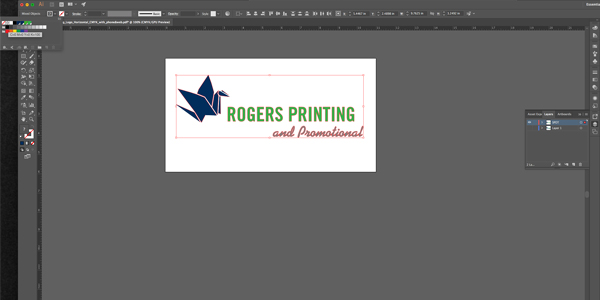
The most important part is to *paste in place* (CMD + ALT + SHIFT + V). This part indicates exactly where we want the effect, so it needs to be in the exact same spot. I’ll DELETE (not hide, like I did in the screenshots) the layer that holds my phone number and email so that just this logo is showing. My new layer named “Spot” needs to be all black.
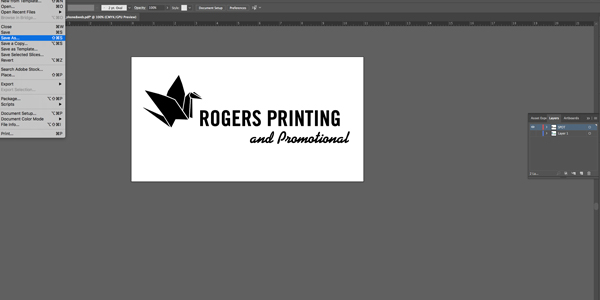
That’s it! We’re all set with our spot UV mask, which also works perfectly for foil. I’m going to save this file as “SPOT.pdf” (and make sure to delete any other hidden layers).
Ask us about spot UV, Aquafoil (any ((printable)) color foil you can imagine), gold or silver or bronze foil, raised foil, raised spot UV, or TONS of other options to stand out with print. Surprise and delight your customers with these special effects using the latest print technology.
Great article this is very nice information I like that. That’s great to see you here in your blog and I will try to come again and get more technical knowledge and logo designs tips as well.
thanks for tips. since there would be two different file for this, how to ensure the UV Spot is exactly on the Printing object? in illustrator, how to align this?
Thanks for the comment! Two options. Paste in place, COMMAND+ALT+SHIFT+V Mac or CONTROL+ALT+SHIFT+V PC, to work with layers. Otherwise just open your color file, save it as spot, edit whatever you want foiled to black, and delete anything else.